Before.....

The following steps are everything that I do, if I can be bothered to do it all and when staying in my jammies all day isn't an option! Sometimes, I just pick and choose from these tips. I know that some of my friends who have recently had babies wouldn't have the time or inclination to do all of these things and for other friends, if they have had a night of one or two (thousand) drinkies, they might fall back asleep after the first few steps!
Step 1. When you get home, before you go to bed, take off your make up. No matter how tired you are and how good the bed looks, take off the makeup, use a serum and hydrating moisturiser.
Step 2. The next morning, it's important to cleanse and exfoliate. I use an oil based cleanser because I have dry skin and I use a natural exfoliant but if things are really dodgy, I use the Elemis Papaya Enzyme Peel.
Step 3. Put two tea spoons in the fridge whilst you are showering and then, put them under your eyes, which cools and de-puffs them. You'll look like a total loon but it's worth it.
Step 4. Serum, moisturiser, eye cream, tea tree oil. If you break out when tired, hormonal, over indulged or for any other reason, something natural like Dr. Organics Bioactive Organic Tea Tree Pure Oil on a cotton pad will help you out. Dab onto the dodgy areas. This will reduce redness and sort spots but it won't dry out the skin, like Quinoderm or other spot treatments. The serum that I use is the REN Vita Mineral Omega 3 Oil. It's so hydrating and feels nice even on a good day. On a bad day, it's like skin medication. However, I keep it away from my eyes. Otherwise, my make up slides everywhere.
Then, use a light moisturiser, which is hydrating to tired, worn out skin. I use Ole Henriksen's Truth Creme Advanced Hydration. Finally, I try to use an eye treatment of some kind. At the moment, I use the Aveda Botanical Kinetics Energyzing Eye Creme, which depuffs and feels luxurious without being too much. I had a treatment using that range and have used it ever since.
Then, use a light moisturiser, which is hydrating to tired, worn out skin. I use Ole Henriksen's Truth Creme Advanced Hydration. Finally, I try to use an eye treatment of some kind. At the moment, I use the Aveda Botanical Kinetics Energyzing Eye Creme, which depuffs and feels luxurious without being too much. I had a treatment using that range and have used it ever since.
Step 5. Let the moisturiser soak into the skin.
Step 6. Use a wrinkle filler, an illuminating primer and a pore filler.
You can't close pores, it's not possible but you can make them look smoother. I use Olay's Regenerist 30 second Wrinkle Filler to blur my wrinkle lines and smooth the pores on my cheeks.
Something illuminating for a primer is useful because skin can look sallow if tired. I use Benefit's That Gal.
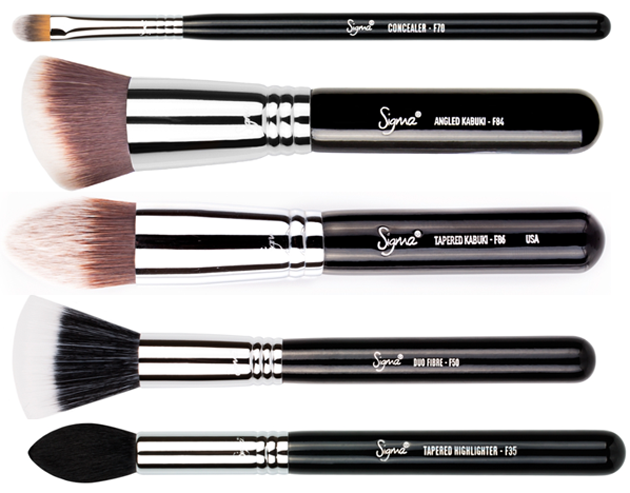
Step 7. Use a highlighting concealer under the eye, making a triangle shape, with the point of the triangle hitting the top of the cheeks. The key here is to not use too much product. I use a tapered kabuki brush to blend the product, dabbing it onto the skin. Let's face it, the eyes are probably a bit delicate! Dabbing is probably the best option! To see the brushes that I tend to use, click here.
Step 8. I will wear foundation, especially if I am looking a bit poorly, but again, less is more and I tend to use it in certain places, such as my cheeks, where I can get some discolouration.
I use a Real Techniques Stippling Brush to buff the product into my chops! My foundation of choice is Georgio Armani's Luminous Silk Foundation because it's light, leaves a beautiful natural finish and covers any discolouration.
Step 9. This step is a bit of a weird one. Before I add anything else, I will use a moisturiser again. Yep, I know, odd. I press the moisturiser between my fingers and then, press it into my face and allow it to absorb. Again, not loads, just a top up of hydration. It makes the skin look perkier and somehow, helps the product settle into the skin.
Step 10. Eye primer. A must because my eyes water when I am sleepy or hungover and feeling very sorry for myself.
Step 11. I brush my brows and apply a brow product, either powder or gel. Again, less is more but definition will help you to look more pulled together.
Step 12. On my eyes, I make sure that I use a light, brightening colour that counteracts the redness. I will also use some kind of neutral colour as a base. Some people use paintpots or eye shadow sticks. I tend to go for something that is cool toned. I suit cool toned colours, especially if I have redness around my eyes. I also avoid any dark, sultry eye looks. My eyes just can't pull it off at this point!
Step 13. I contour. When tired, my chops get crazy! I use the Hourglass Ambient Light Palette. With an angled contour brush, I apply the subtle warm shade (Radiant Light) and I make sure that I have some definition. I also use Sigma's Tapered Highlighter (F35) brush to apply the highlighting shade (Incandescent Light) on the brow bone, down the nose, above the brows, on the cupid bow and just below the contour line, above the jaw line. Here comes some definition! Hurrah.
Step 14. Now my eyes have gotten over the fact that they have product on and hopefully, stopped watering, I do winged eyeliner. This gives my puffy eyes some shape. I set that with some light setting powder, usually Laura Mercier.
Step 15. I use mascara that gives long, voluminous lashes without clumping or depositing too much product. I am a big fan of Armani Eyes to Kill. I used to use some natural mascaras but they ended up half way down my face. Not great!
Step 16. Spray a setting spray or even something like the Caudalie Beauty Elixir. I know it's not meant for setting but it hydrates, seems to illuminate the skin and for me, it has actually helps makeup look revived on dull skin.
Step 17. Try and nap during the day! Everyone loves a power nap!
Step 18. Drink lots of water. Hydrate.
Step 19. Make a smoothie with veggies and fruit to nourish body and skin.
Step 20. Remind yourself that tomorrow is another day and enjoy life...even if you're feeling a little under par. A wonderfully, happy personality is far more fabulous!
After....